IFTTT
IFTTT is a web service that allows users to create chains of simple conditional statements, so called “Applets”. With the IFTTT component you can trigger applets through the “Webhooks” service (which was previously the “Maker” channel). See the announcement blog post for examples how to use it.
# Example configuration.yaml entry
ifttt:
  key: xxxxxxxxxxxxxxxxxxxxxxxxxxxxxxxxxxxxxxxxxxx
key is your API key which can be obtained by viewing the Settings of the Webhooks applet. It’s the last part of the URL (e.g. https://maker.ifttt.com/use/MYAPIKEY) you will find under My Applets > Webhooks > Settings.
 Property screen of the Maker Channel
Once you have added your key to your configuration.yaml file, restart your Home Assistant server. This will load up the IFTTT component and make a service available to trigger events in IFTTT.
After restarting the server, be sure to watch the console for any logging errors that show up in red, white or yellow.
Testing your trigger
You can use the Developer tools to test your Webhooks trigger. To do this, open the Home Assistant frontend, open the sidebar, click on the first icon in the developer tools. This should get you to the Call Service screen. Fill in the following values:
| Field | Value |
|---|---|
| domain | ifttt |
| service | trigger |
| Service Data | {"event": "EventName", "value1": "Hello World"} |
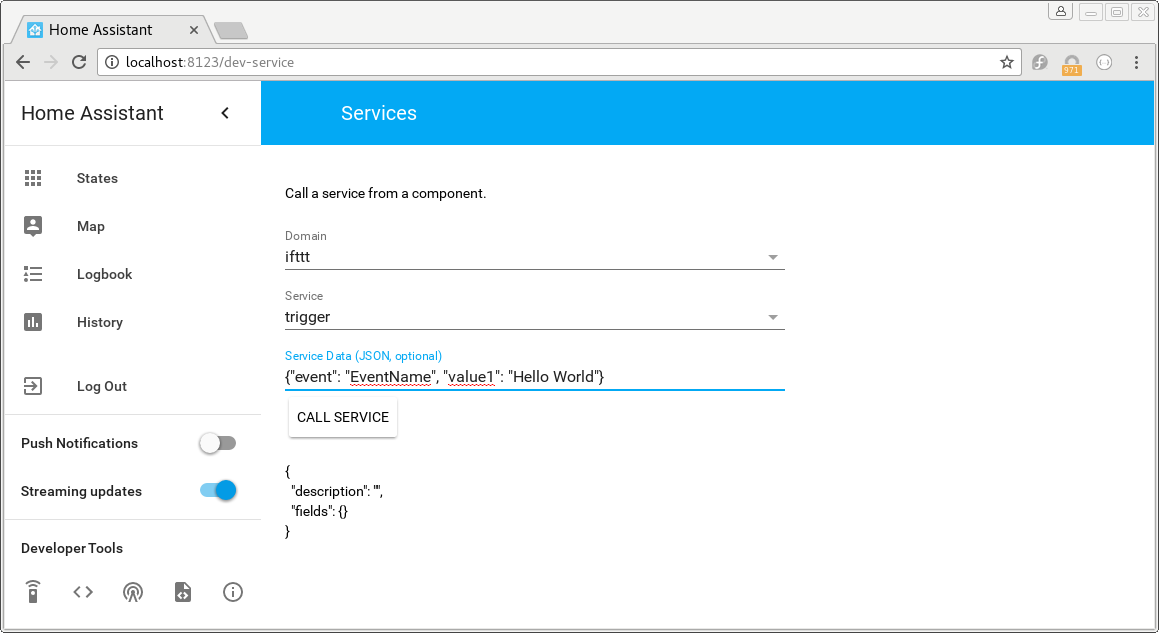 When your screen looks like this, click the ‘call service’ button.
Setting up a recipe
Press the New applet button and search for Webhooks.
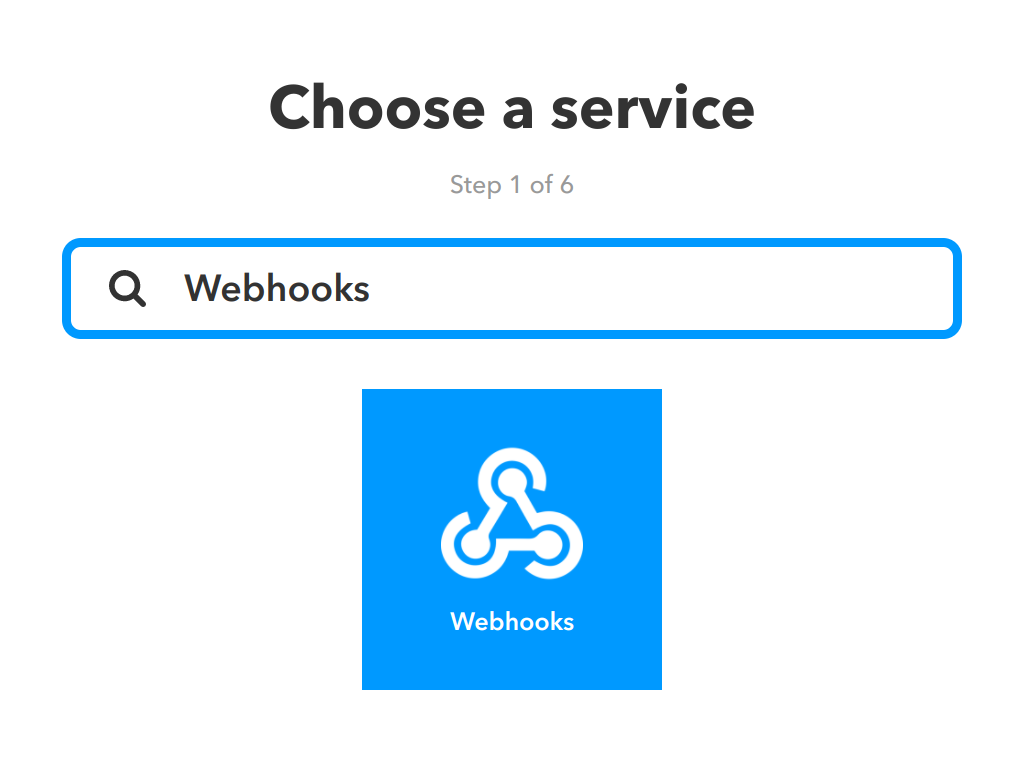 Choose “Webhooks” as service.
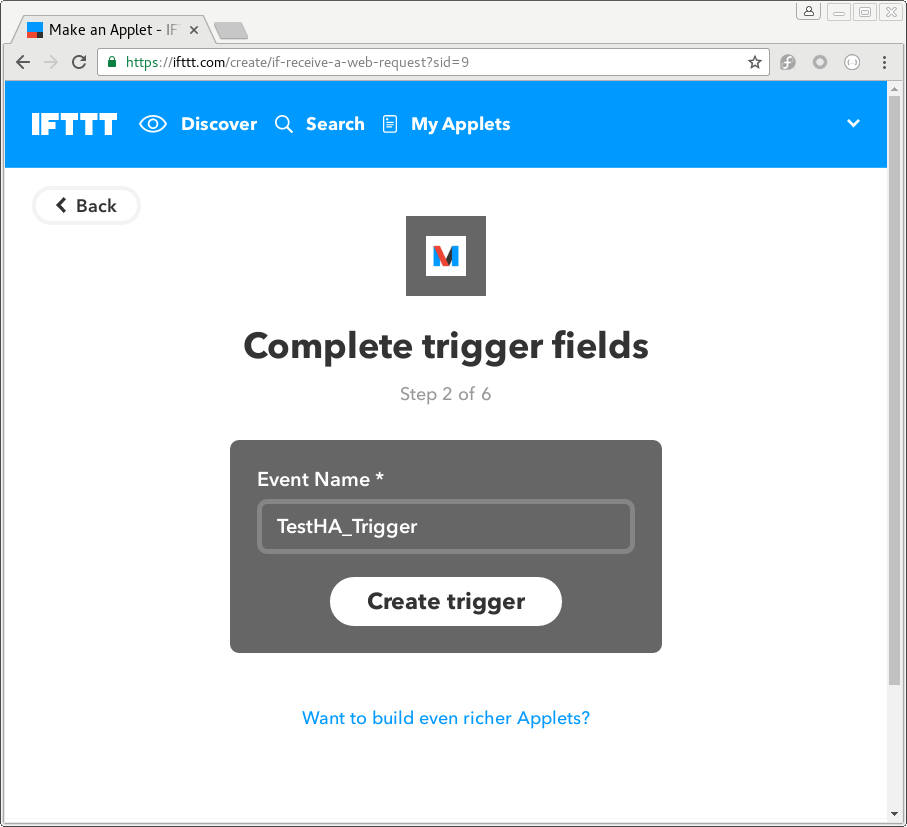 You need to setup a unique trigger for each event you sent to IFTTT.
# Example configuration.yaml Automation entry
automation:
  alias: Startup Notification
  trigger:
    platform: homeassistant
    event: start
  action:
    service: ifttt.trigger
    data: {"event":"TestHA_Trigger", "value1":"Hello World!"}
IFTTT can also be used in scripts and with data_template. Here is the above automation broken into an automation and script using variables and data_templates.
# Example configuration.yaml Automation entry
automation:
  alias: Startup Notification
  trigger:
    platform: homeassistant
    event: start
  action:
    service: script.ifttt_notify
    data_template:
      value1: 'HA Status:'
      value2: "{{ trigger.event.data.entity_id.split('_')[1] }} is "
      value3: "{{ trigger.event.data.to_state.state }}"
#Example Script to send TestHA_Trigger to IFTTT but with some other data (homeassistant UP).
ifttt_notify:
  sequence:
    - service: ifttt.trigger
      data_template: {"event":"TestHA_Trigger", "value1":"", "value2":"", "value3":""}
Sending events from IFTTT to Home Assistant
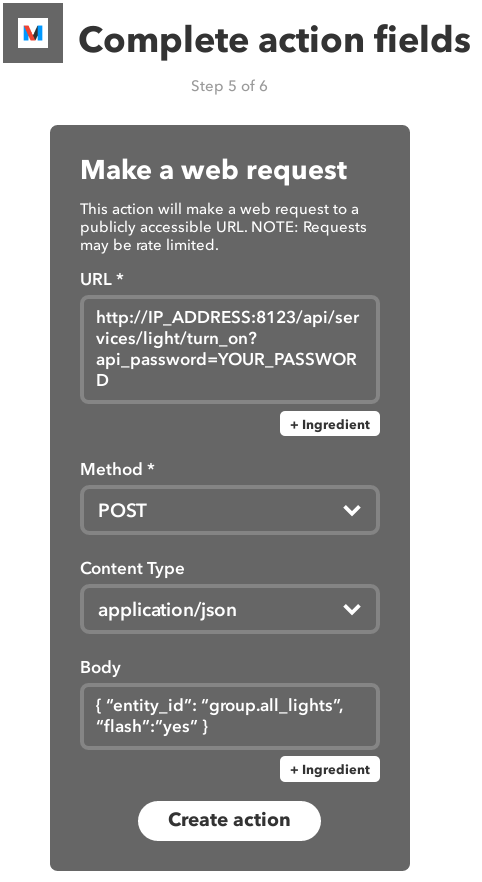
To be able to receive events from IFTTT, your Home Assistant instance needs to be accessible from the web. This can be achieved by forwarding port 8123 from your router to the device running Home Assistant. If your ISP is giving you a new IP address from time to time, consider using DuckDNS.
In the URL field, you can then put an API URL. You probably want to use a POST action, so select POST as method. After your request line, you need to add your Home Assistant password, which you defined in the http section of your config, in the form of ?api_password=YOUR_PASSWORD. For the message body, refer to the API page linked above.
Additional Channel Examples
Additional examples of using IFTTT channels can be found below.
| Channel | Description |
|---|---|
| Manything | Automates turning recording ON and OFF based on Home Assistant AWAY and HOME values. |