Installation
To run Jupyter Notebooks locally, an installation of Jupyter is needed. Consider to run Jupyter in a virtualenv.
$ pip3 install jupyter matplotlib
Certain notebooks hosted in the Home Assistant notebooks repository require access to a running Home Assistant instance or parts of a Home Assistant installation. If you want to run those notebooks, install Home Assistant with $ pip3 install homeassistant as well.
Now you are able to start the application.
$ jupyter notebook
[I 17:22:18.081 NotebookApp] Writing notebook server cookie secret to /run/user/1000/jupyter/notebook_cookie_secret
[I 17:22:18.921 NotebookApp] Serving notebooks from local directory: /home/fabaff/home-assistant
[I 17:22:18.921 NotebookApp] 0 active kernels
[I 17:22:18.921 NotebookApp] The Jupyter Notebook is running at: http://localhost:8888/
[I 17:22:18.922 NotebookApp] Use Control-C to stop this server and shut down all kernels (twice to skip confirmation).
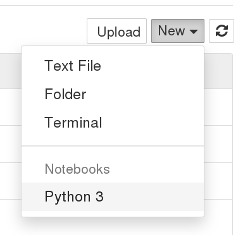
Open http://localhost:8888/ in your browser. Press “New” -> “Python3” to open a new notebook.
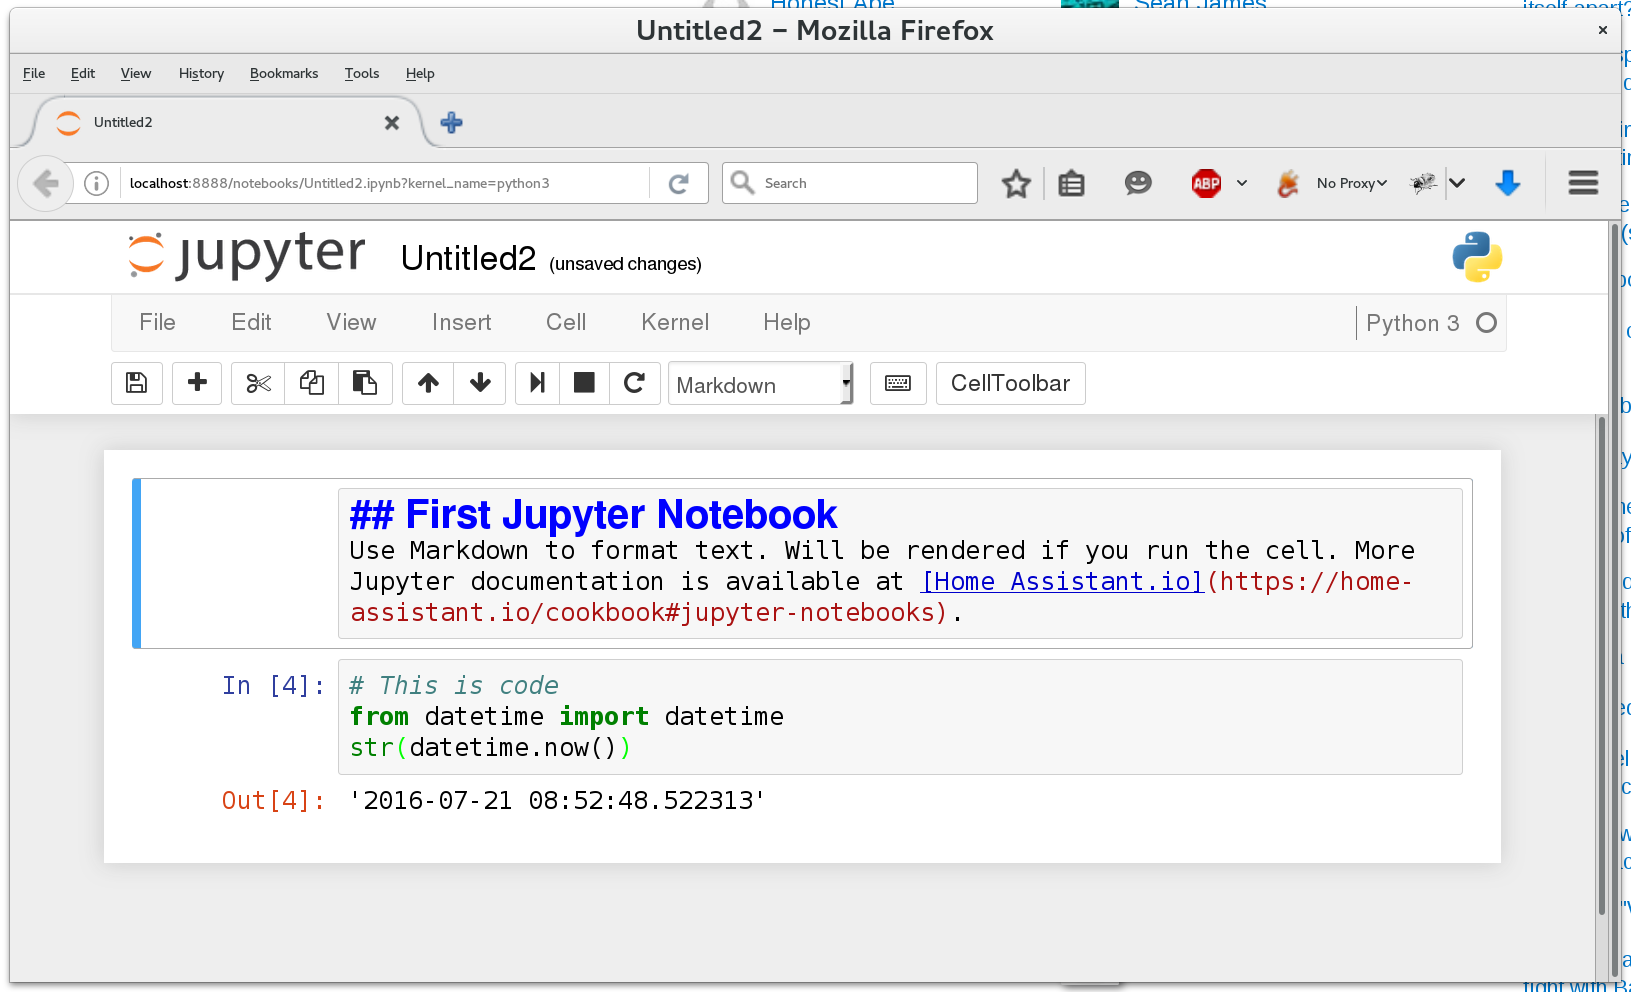
You will get an empty notebook with one cell. Cells can contain code or text. To get the output of a cell you need to execute them with “Cell” -> “Run Cells” from the menu or by pressing the icon.
The downloadable version of this notebook is available in the Home Assistant notebooks repository.
As you can see is the workflow very similar to working directly with a Python shell. One advantage is that you can go back and forth as you please and save your work.