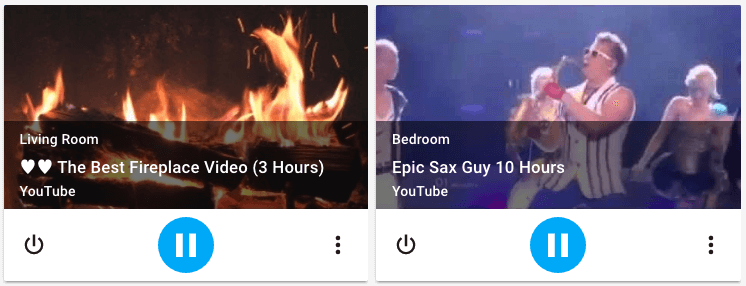
0.18: Bluetooth, LG WebOS TVs and Roombas.

three minutes reading time
  • Release-Notes
Comments

It’s time for 0.18. This release cycle is 2 days shorter than usual as I’ll be travelling to Europe. This also means that it can take some more time before you get feedback on PRs.

Since the last release we have moved all Home Assistant source code etc into it’s own organisation on GitHub. We’re growing up! This sadly did cause us to have to move all Docker images. Check the breaking changes section for more info.

Breaking changes

  • We have migrated our datetime format to be iso8601. This will only impact you if you are consuming the date times from the API directly. You can ignore this if you are just using Home Assistant via configuration and the frontend.
  • The constant TEMP_CELCIUS is now correctly called TEMP_CELSIUS. Old one is deprecated and will eventually be removed.
  • The location of the Docker image has changed. There was no possibility for us to keep maintaining the old image (as it was bound to the GitHub repo under my name) or to make a redirect. So if you are using the Home Assistant Docker image, change it to run homeassistant/home-assistant:latest for the latest release and homeassistant/home-assistant:dev for the latest dev version.
  • MySensors received two big changes that will cause you to update your configs. See component page for new example config.
    1. All MySensors entity IDs are different! There was an error in the naming that caused MySensors to append node ID and child ID instead of separating them with an underscore. This has been fixed but will cause all your MySensors entity IDs to change. This is a one time breaking change.
    2. The second change is that we now support the TCP ethernet gateway. This is causing a slight change to the config format: you have to change port: under gateways to device:.

To Infinity and Beyond 🚀

two minutes reading time
  • Organisation
Comments

After 2.5 years I think we can proudly say: Home Assistant is a success. I write we because Home Assistant is no longer a one-person side project. It has become the side project of many people who spend countless hours on making Home Assistant the best home automation software out there. To acknowledge this we migrated the repositories from being under my name to be under our own organisation on GitHub.

On our journey we’ve reached many noteworthy milestones:

  • #1 on HackerNews
  • Featured on ProductHunt
  • Trending repository on GitHub
  • 3000 stars on GitHub
  • 1.5 million page views on our website
  • Speaker at OpenIoT Summit 2016

All these accomplishments are a nice pat on the back but our journey is far from over. There are a lot of challenges ahead if we want to become the go to solution for home automation for everyone.

Until now the focus has been on making a platform that developers love to use. A platform that is simple but customizable. A platform that is both powerful and reliable. But most important: a platform that is local and open. Home Assistant does a great job at all these things.

There will be some major challenges ahead of us to target groups other than developers. Easy installation and easy configuration being the #1. I’m sure that we’ll be able to eventually achieve these goals. I can’t say yet how or when. As with everything Home Assistant, we’ll take tiny steps, gathering feedback along the way to make sure we’re solving the right problems.

I am confident that we will get there because we are set up for success: we have a robust architecture, high test coverage and an active community of world class developers and users. On top of that, we use Python which allows us to move fast and tackle complex problems in elegant ways. It is so easy to learn that it allows any programmer, experienced or not, to contribute support for devices and services. It’s as simple as filling in the blanks.

I would like to put out a big thank you to all our contributors who make Home Assistant what it is today. It doesn’t matter if it is form of code, documentation or giving support in our chat room or forums. You. all. rock.

Cheers to the future!

Paulus


Updated documentation

1 minute reading time
  • Website
Comments

One of the main complaints that we receive is something along the lines “I read that X is possible yet I am unable to find it on the website.”. This post is to announce that we have taken the first steps to improve it by revamping the getting started and developers sections. It’s still a work in progress but we now have a solid foundation to build on for the future 👍.

Our documentation has been going through various phases. Initially it was just the README in our GitHub repository. I discovered Jekyll and GitHub pages in December 2014 and created home-assistant.io. I more or less broke the README in 5 pages and called it a website. Back then we had a whopping 11 components.

As Home Assistant grew, so did our documentation. Fabian Affolter does an amazing job in making sure there is at least a documentation stub for each new feature that lands. And that’s quite a feat given our frequent releases! But despite all the efforts, the documentation outgrew our existing documentation organisation.

Today it has been almost 1.5 years since we started the website. We now have 264 components and platforms under our belt and have been honored with 1.5 million page views ✨. And hopefully we now also have documentation that our community deserves.

Finally, if you see some content that could use more clarifcation or is outdated, don’t hesitate to use the ‘Edit in GitHub’ link that is present on each page.


0.17: Onkyo, Panasonic, GTFS and config validation

1 minute reading time
  • Release-Notes
Comments

Another awesome release ready to hit your homes. YAML can be hard for beginners and more experienced automators. So to help catch those pesky errors that sneak into your files we’ve been hard at work to introduce config validation! Especially huge thanks to @jaharkes for his hard work on this. Config validation is still in it’s early stages. More common platforms and components have been added but we didn’t do everything yet.

When we encounter an invalid config we will now write a warning to your logs. You can see those in the frontend by clicking on the last developer tool. We’re looking into options to make it more clear - it is a work in progress.

Another big thing is the addition of GTFS support. You probably don’t know it, but GTFS is the standard that public transit companies all over the world use to distribute their schedule. This means that you can now have the time of the next bus/train/etc right in your frontend.

Breaking changes

As of now we are not aware of any breaking changes. However, it might be that Home Assistant will not start for you because of an invalid configuration. A common mistake that people are making is that they are still referring to execute_service in their script configs. This should be service.


Static website

1 minute reading time
  • How-To
Comments

The frontend of Home Assistant is served with the help of a local web server. If you have customized your installation you already use this functionality. The content of your folder www in your Home Assistant configuration directory (.homeassistant) is available under /local (eg. http://localhost:8123/local for an index.html file).

But there is more you can do! You can not only host images for customization there but HTML files or even web applications including CSS and Javascript.

Read on →

Your hub should be local and open

1 minute reading time
  • Internet-of-Things
Comments

Today the news spread that Google will be shutting down the Revolv hubs. And shutting down here doesn’t mean they stop selling or supporting them - no, they are sending an update to each hub to turn your perfectly fine home automation hub into a useless piece of plastic. The fact that this seemed like a good idea by Google astonishes me. If anything, they should have gone the same route as ninjasphere: open it all up and let people decide on the fate of their own hub.

I’ve said it before but I’ll repeat it again:

The cloud should be treated as an extension to your smart home instead of running it.

Your hub should not be affected when your internet breaks down or the company that sold you your hub goes out of business. It should work locally so that it can continue to work even long after the vendor goes out of business or decides to kill it. Preferably, your hub should also be open so that the community can take over development after the vendor stops caring.

Unless you can afford losing a product here and there, be cautious when buying IoT products that depend on the cloud from companies that are not well established. The chances are high that they go bankrupt or get acquired and closed. This however is easier said than done as Gartner predicts that by 2017, 50 percent of IoT solutions will originate in startups that are less than three years old.


0.16: Embedded MQTT broker, Uber, Yamaha receivers and Growl

two minutes reading time
  • Release-Notes
Comments

Party people, 0.16 is here! The big thing with this release is that we have completely removed the barrier to get started by MQTT by being able to launch an embedded MQTT server: hbMQTT. Just add mqtt: to your config and a broker is launched and connected with Home Assistant. See the documentation for more info.

Further in this release a bunch of cool new stuff, bug fixes and rewrites for the Vera and Tellstick component (see breaking changes section at bottom for this!).

Rock on.

Breaking changes

  • Automation: support for old deprecated config has been removed

  • Tellstick configuration has changed

tellstick:
  signal_repetitions: X
  • Vera configuration has changed
vera:
  vera_controller_url: http://192.168.1.161:3480/
  # Optional to exclude devices - this is a list of vera device ids
  exclude: [ 13, 14, 16, 20, 23, 72, 73, 74, 75, 76, 77, 78, 88, 89, 99]
  # Optional to import switches as lights - this is a list of vera device ids
  lights: [15, 17, 19, 21, 22, 24, 26, 43, 64, 70, 87]

0.15: Unforked Open Z-Wave, templated service calls, extended scene support and PEP257 compliance.

1 minute reading time
  • Release-Notes
Comments

Two weeks has past so here is 0.15! We have been focussing a lot on quality. Making sure the system is more stable and reliable. I usually try to highlight one cool thing in the release notes but this release has 4 exciting announcements!

  • @fabaff has upgraded the codebase to follow the PEP257 documentation standard.
  • @partofthething has migrated us to use the main Python Open Z-Wave library instead of our forked version.
  • To make our automations more powerful, @persandstrom added the option to use templates to dynamically create service calls. This works for automation, Alexa, universal media player, template switch. Learn more.
  • @MartinHjelmare has upgraded our scene support to now support all built-in services and components.

Besides bug fixes, this release also brings:

# Example using templates for service and data in service call.
# Works for automation, Alexa, universal media player, template switch.
automation:
  - trigger:
      - platform: state
        entity_id: switch.bathroom
    action:
      service_template: >
        {% if is_state('switch.bathroom', 'on') %}
          switch.turn_on
        {% else %}
          switch.turn_off
        {% endif %}
      data_template:
        entity_id: switch.{{ states('input_select.is') }}

Breaking Changes

  • Media Player: Attributes to call service play_media has been renamed to media_content_type and media_content_id, to match the corresponding media player state attributes. This change affects automations, scripts and scenes.

0.14: Steam, D-Link smart plugs and Neurio Energy Sensors

two minutes reading time
  • Release-Notes
Comments

It’s been another two weeks which means it’s time for release: 0.14!

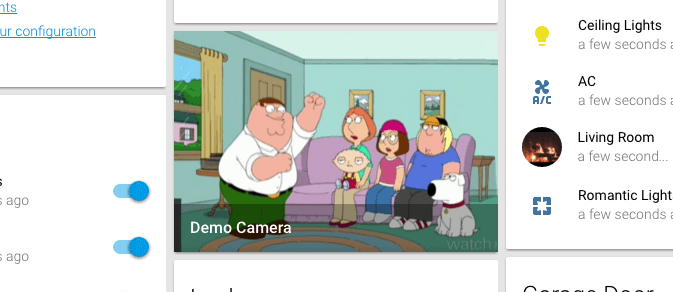
Camera feeds are now directly embedded in the frontend.

Backwards incompatible changes

  • Component: Simple Alarm has been removed. Still available in the cookbook.
  • Script: Turning on a script that is already on is now a no-op instead of skipping current delay.
  • Wemo switches now have to be set up via the main Wemo component
  • Command line platforms for switch, sensor and binary_sensor have been renamed to command_line.
  • The rfxtrx sensors entity ids will incur a one time change to move to a stable format. See the docs for more details.

Community Highlights

two minutes reading time
  • Community
  • Video
Comments

Home Assistant land has been busy and a lot of people have been creating awesome stuff. We’ve added a cookbook section to the website full of examples how you can automate different things. Make sure you take a look and share your own recipes too!

Home automation demo by Part of the Thing

Haaska - Alexa Skill Adapter for Home Assistant

Haaska allows you to control lights, switches, and scenes exposed by your Home Assistant instance using an Amazon Echo. This is different from our own Alexa component because it will teach the Amazon Echo directly about the devices instead of teaching it to talk to Home Assistant. It will not allow you to use custom sentences but it will allow you to skip the ‘Ask Home Assistant’ part when giving commands:

  • “Alexa, set kitchen to twenty percent”
  • “Alexa, turn on evening scene”
  • “Alexa, turn off bedroom light”

Haaska on GitHub

Integrating Home Assistant with HomeKit

Contributor Maddox has created a plugin for HomeBridge, an open-source HomeKit bridge. This will allow you to control your home using Siri on your Apple devices. HomeBridge has recently restructured so you’ll have to install the plugin separately with the homebridge-homeassistant npm package.

Example config.json entry to load Home Assistant:

"platforms": [
    {
        "platform": "HomeAssistant",
        "name": "HomeAssistant",
        "host": "http://192.168.1.50:8123",
        "password": "xxx",
        "supported_types": ["light", "switch", "media_player", "scene"]
    }
]

HomeBridge on GitHub HomeBridge Home Assistant Plugin

Custom alarm system with Home Assistant

User thaijames describes in the Home Assistant forums how he has created his own NFC-based alarm system using Home Assistant, DIY components and Garfield dolls.

Hold your NFC tag against the belly of Garfield to unlock the alarm.